Currently, Google Earth is no longer available. We suggest using Android Auto or Apple CarPlay for Audi and use Google Maps.
What is Audi Connect & Google Earth?
Audi Connect & Google earth are services provided by Audi for MMI 3G Plus (but not only, they can be also found in newest Mib units).
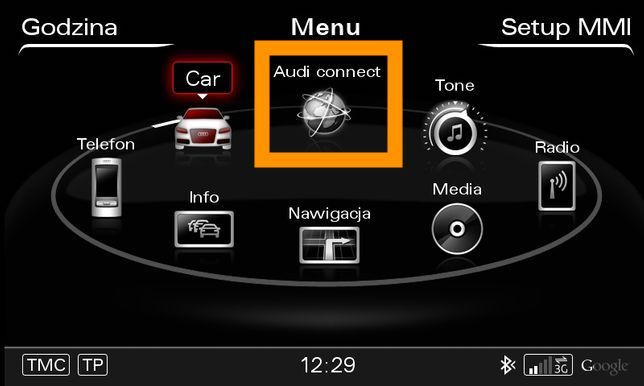
Audi Connect might be very useful for some people, as you can find there informations about nearest petrol stations, car parks (with prices), weather, travel informations (speed limits and other). This service it’s provided free of charge for any audi which got SIM card slot.

Google earth is an layer on local maps which adds better map look

but also can use internet connection to find an address or some online POI.
Can I enable on my MMI?
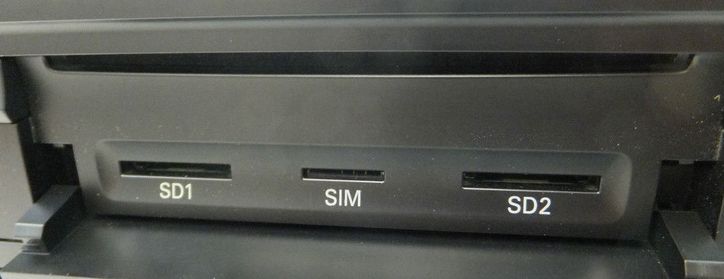
If your car is equipped with SIM card slot (mostly between SD CARDs) – then YES!
Cars equipped with SIM slot mostly needs only firmware update to the latest one:
WHOLE WORLD (Without USA / CANADA / Mexico / Japan) CARS:
USA / CANADA / MEXICO
if you don’t know how to check what firmware you got, we do have tutorial how to check it – click here.
Can i use any SIM cards?
Audi has not specified which SIM cards you can use, but as far as we know – every sim card should works just fine with MMI.
How to enable Audi Connect & Google Earth
Sometimes happen that after firmware update you can’t see new tab Audi Connect or new option in satnav settings to enable Google Earth.
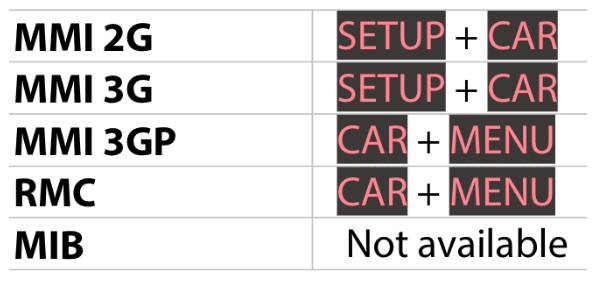
You’ll need do few steps – you’ll need activate Hidden Green Menu & got newest firmware.
Go in to Hidden green Menu

When you are in, please navigate the selection to “diagnose” by turning the big selection wheel

Now please navigate into the “diagnose” sub-menu.
To do so, please press down the big turning wheel once.
In the case that you once accidentally clicked wrong, you can always navigate one level up by pressing the “RETURN” button on your MMI control panel.
Now the screen should looks like:
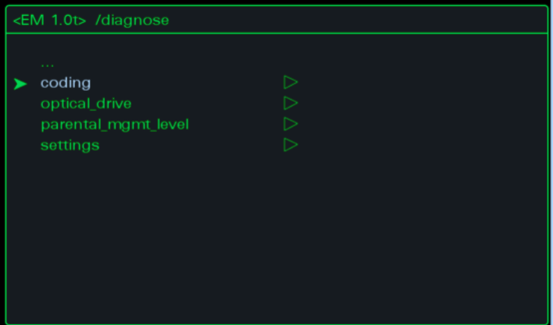
As you can see quite well on the top of this picture, the menu helps you with orientation.
You are now located in the first sub-level of the main menu (of the green menu). That is the level “diagnose” (as you remember, there were quite some different selectable sub-levels in the main menu).
Please now click on “coding” (as in the previous case, by pushing down the big turning wheel) Now you should see the following:
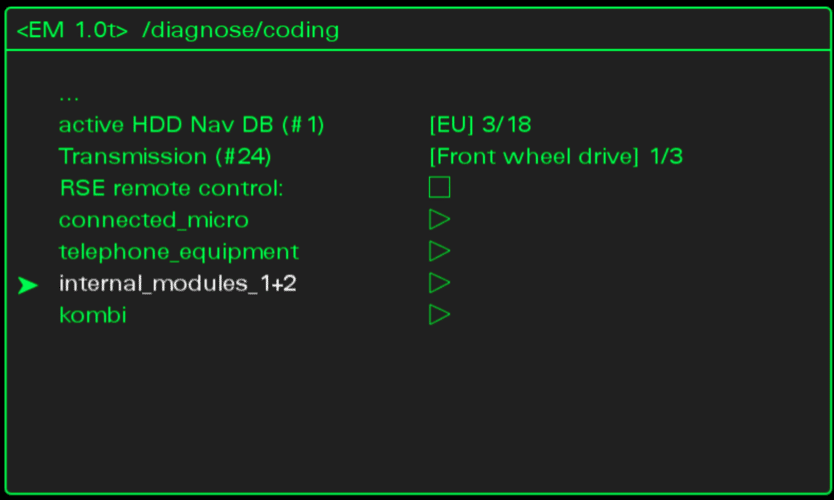
Again you can well see that you are now one level down from “diagnose”, named “coding”. (/ diagnose/coding)
With RETURN you could now return back up to “diagnose” (but this just as a remark, to explain the basic navigation through the green menu and its levels)
The picture above already illustrates, where you have to move your selection on. That menu point is called “internal_modules_1+2” (it’s done again by turning the big turning wheel until your selection highlight is moved to the desired menu point).
Now please click to get to the following screen:
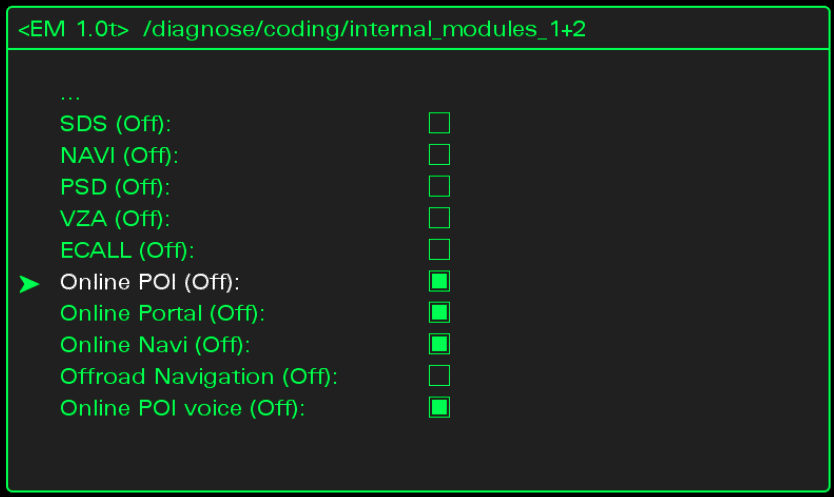
For retrofitting the online services, the fields “Online POI (off)”, “Online Portal (Off)”, “Online Navi (Off)” as well as “Online POI voice (Off)” are relevant.
Please navigate to each of these named selection fields and click on it once, by pushing down the turning wheel once. With each click the previously filled checkbox should turn empty (unselected). If you double clicked, please just click again until the corresponding checkbox turned empty (unselected).

Overall the screen should like similar to the following screenshot after you are finished with reconfiguration (the online service relevant parts of it):

Goal of the next step is activating the WLAN streaming and the WLAN configuration dialog of the MMI system.
For that, now please move up two levels in the menu system. That is done by pushing the “RETURN” button twice.
You should now see the following screen contents:
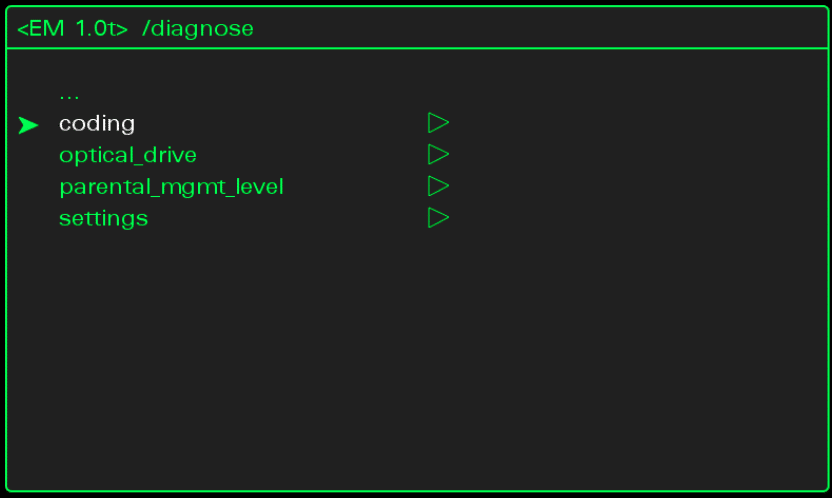
Now please go to the “settings” and enter that sub-menu. The screen should look as:
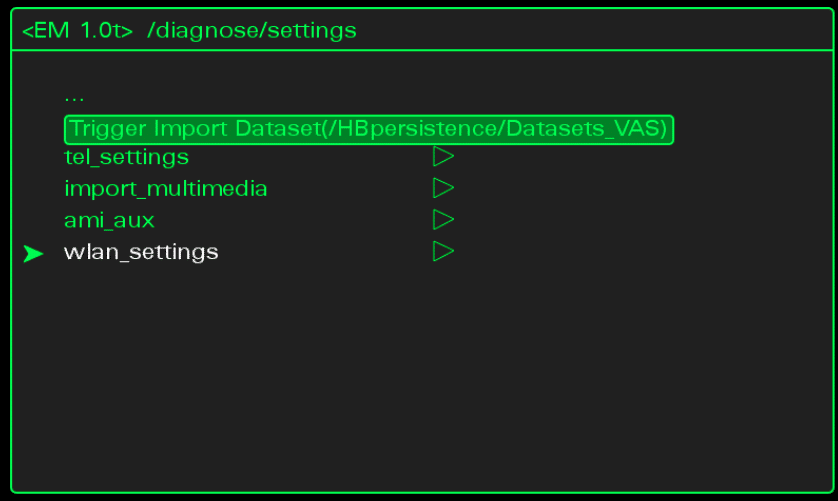
In this case the screenshot also shows where to navigate next – “wlan_settings”. Please enter that sub-menu.
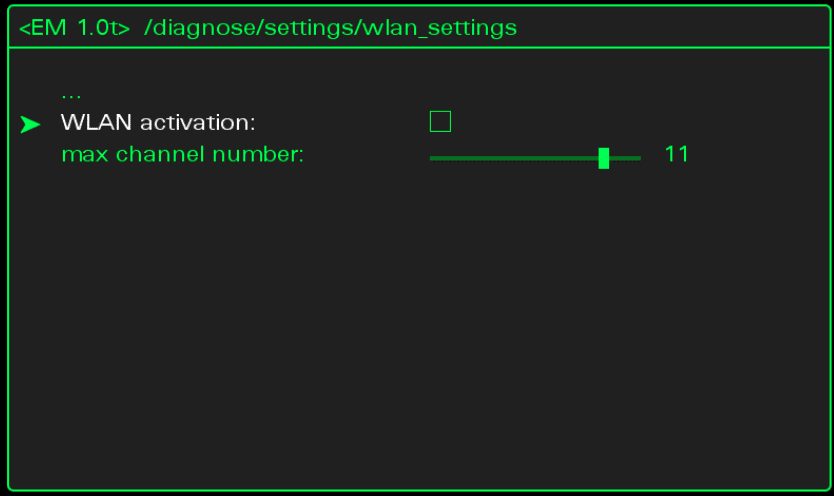
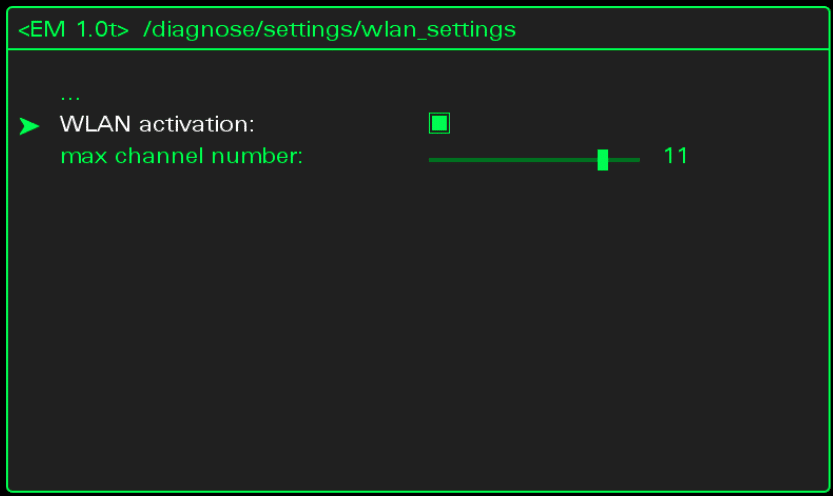
Now please activate the “WLAN activation” checkbox.
The activities are the same as previously with the online services activations
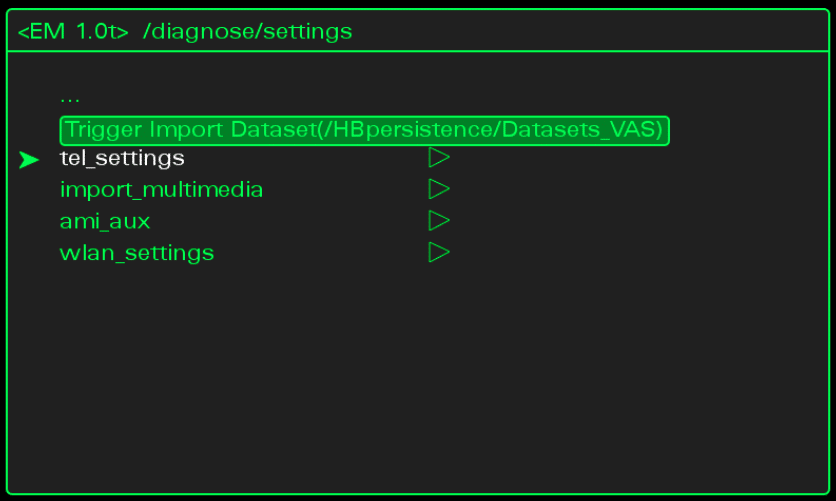
Please navigate on level up and enter “tel_settings”.
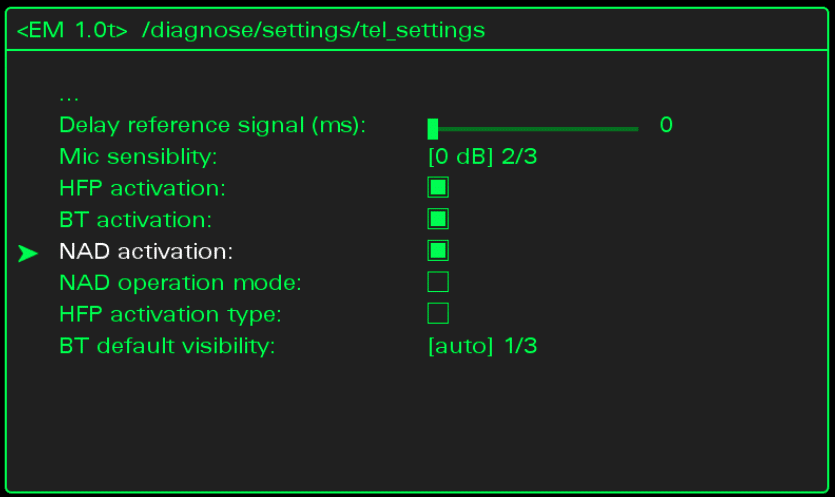
In this menu now please check “NAD activation” (as shown in the picture). This at will activate the „Google“-logo shown in the lower status bar.
Now please step up one level in the menu system and enter “ami_aux”.
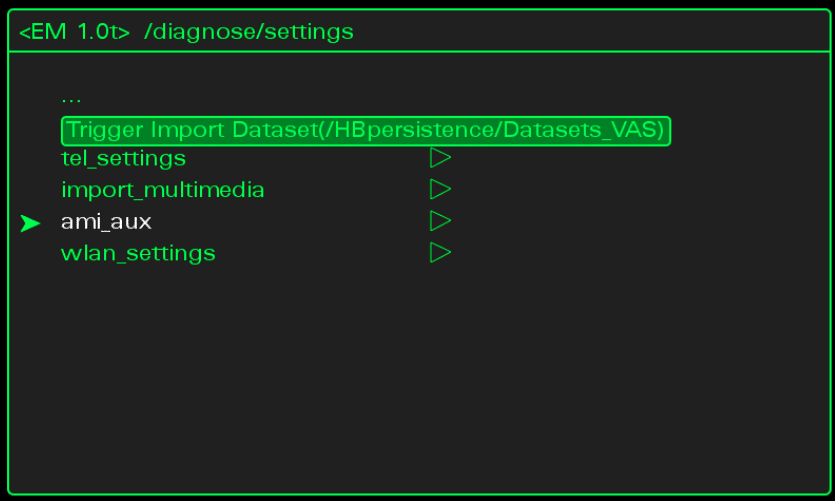
Please enter the “ami_aux” submenu and set there “AMI” and “AMI BT” to enabled, in case one or both are currently not enabled.
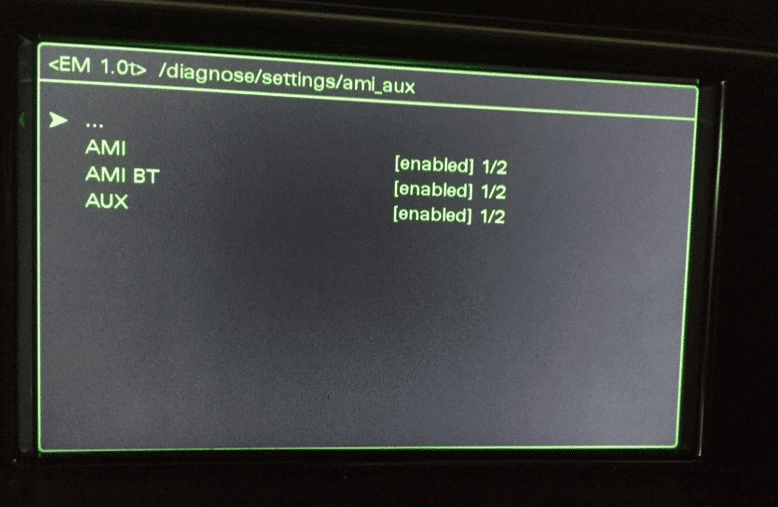
The setting “AMI BT” is not required for this retrofit, but is generally a good thing as it allows Bluetooth audio streaming (so called A2DP profile). So after activation you will also be able to stream music to your MMI from a Bluetooth A2DP capable device (like a smartphone). Excellent!
Now you have to reinstall GEMMI option from firmware
Put SD CARD with firmware on to MMI slot 1 or 2, go to Engineering menu > Update > select source > then select USER DEFINED.
In DEVICE SELECTION select only GEMMI to be updated.

Every option under GEMMI has to be selected!
PLEASE REMEMBER TO SELECT ONLY APPLICATION, DO NOT SELECT BOOTLOADER!
And perform UPDATE.
After final reboot it should start working! – Remember to insert SIM card in to slot =)
I don’t have SIM card slot in my MMI but want Audi Connect & Google Earth
There’s an option, that you can also enable Audi Connect with Google Earth, you’ll need external device – please take a look on this manual.


 (17 votes, average: 3.65 out of 5)


Hi, is possible enable connection with Google earth follow tutorial? I have a audi a7 2013 with MMI3GP and Sim card.
Evening guys, will this workaround get Google earth view working again on my 2015 MMi3G+ system?
Have the latest MMi update and maps but would like the Google earth view again if possible.
Hi
Can you help with the loss of google earth on 2018 Q7
Cheers
Must this be used with Audi’s SIM, or can I use one of my own? And if I can use one of my own, are there any changes I need to make in the settings for that?